Has this happened to you? You finally get a handle on how to properly package your facility’s medical waste when you suddenly learn that your state has laws that are slightly different from federal regulations. Doh!
Yep, it’s like they do it on purpose, but all states have the authority to add additional rules. And it’s important that you follow these rules, along with those set forth by your local and federal authorities. Because if you don’t, you as a waste generator are subject to fines and penalties.
With this in mind, here are 4 steps that will help you properly package your medical waste (and avoid hefty fines).
Step 1: Identify Waste
You’ve got to be able to identify which wastes your particular state classifies as regulated medical waste (RMW). Most states have a very similar definition of RMW as OSHA. OSHA considers the following to be RMW:
- Sharps
- Liquid or semi-liquid blood or other potentially infectious materials (OPIM)
- Contaminated items that would release blood or OPIM in a liquid or semi-liquid state if compressed
- Items that are caked with dried blood or OPIM and are capable of releasing these materials during handling
- Pathological and microbiological wastes containing blood or other potentially infectious materials.
MedPro Disposal offers low-cost, secure medical waste disposal with predictable service and predictable cost. Check out our practice savings calculator here to see how much you could save on your medical waste disposal.
Find Out How Much You Can Save Instantly.
Try our on-line savings calculator.
Step 2: Check to Make Sure if Special Labeling is Required
You next need to properly package your waste, but to do that, you’ve got to check and see if your state requires special identification on the package. It won’t matter whether you’ve correctly packaged your waste according to DOT’s regulations if the labeling is wrong. Your state may require that you ID the box to be incinerated. Or it may require generator identification on red bags and sharps containers. Check with your service provider for any special state requirements.
Step 3: Plan for Leaks
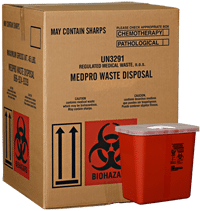
Once you’ve finished setting up your transport box, line it with the red bag liner to reduce the chance of any liquid seeping into the box. Here’s a tip: place an absorbent material such as kitty litter on the bottom of the red bag liner to catch any potential spills.
Finally, place tied red bags and securely-closed sharps containers in your transport box. Never, ever, under any circumstance, place loose sharps in the box. Also not to be placed in the transport box are the following:
- Regular garbage
- Any item contaminated with urine, feces, or other non-OPIM body fluids
- Hazardous and chemical waste
- Compressed gas cylinders
- Radiographic and amalgam waste
- Medication
- Free liquids
Step 4: Seal the Box
When your transport box is ready to seal, close the red-bag liner with either a twist tie, or by tying it into a single knot. Finally, tape the box closed, ensuring the red bag is not visible.
It’s very important you do all of these steps in order and correctly. Should the box be damaged or not packaged properly, your service provider will not accept it and you will have to start all over.
If you have any questions about packaging your medical waste, don’t hesitate to give us a call. We’ve helped countless medical facilities across the country handle their medical waste so they are compliant.


